Getting Started
Payment Guide
Available regions
Purchase Plan
Get a proxy
Integration Tutorial
Browser
Fingerprint browser
Simulator
Proxy Manager
Operating System Settings
Available regions
Purchase plans
Get an proxy
Integration Tutorials
Browser
Fingerprint browser
Simulator
Operating System Settings
Available regions
Purchase Plan
Get a proxy
Integration Tutorial
Browser
Fingerprint browser
Simulator
Operating System Settings
PIA Client
Group Control APP
Client line problem
The client cannot connect to the server
Unable to connect
IP location does not match
Speed issue
Payment issues
Login Issues
Step1:
Before integration, you need to complete the following preparations
1. Download, install and log in
2. Get the proxy IP, please refer to the tutorial: Get IP Proxy
Step2: Proxy configuration
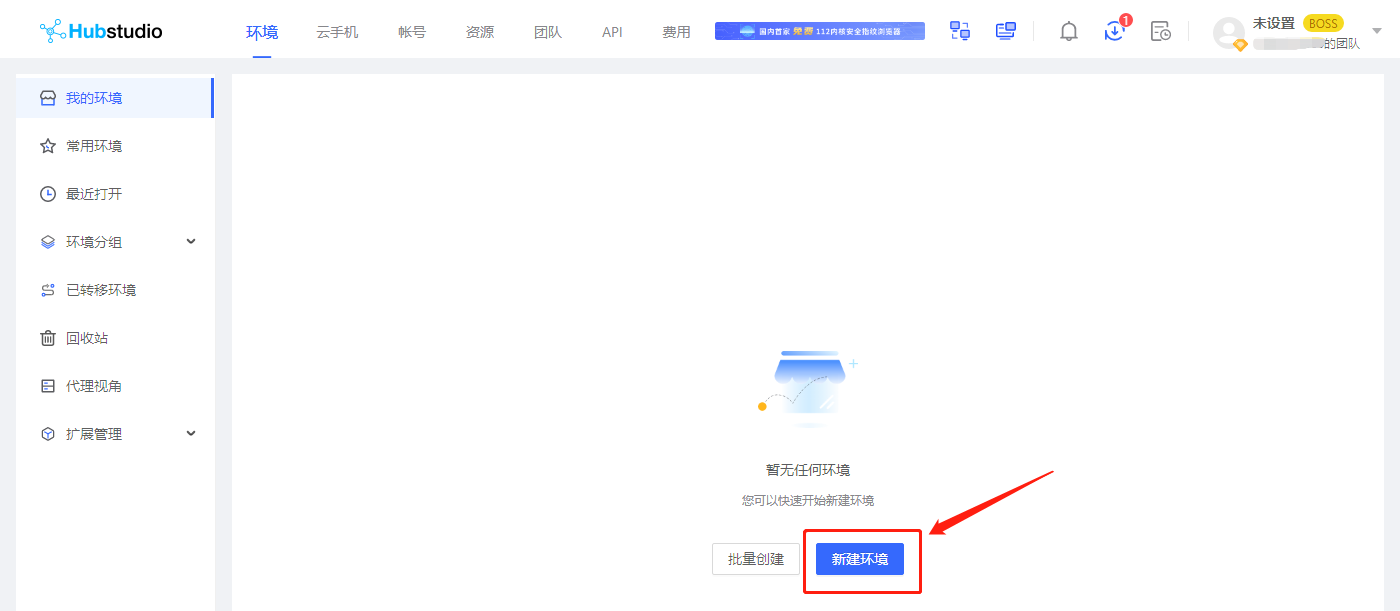
Open the Hubstudio browser, after logging in, click New Environment
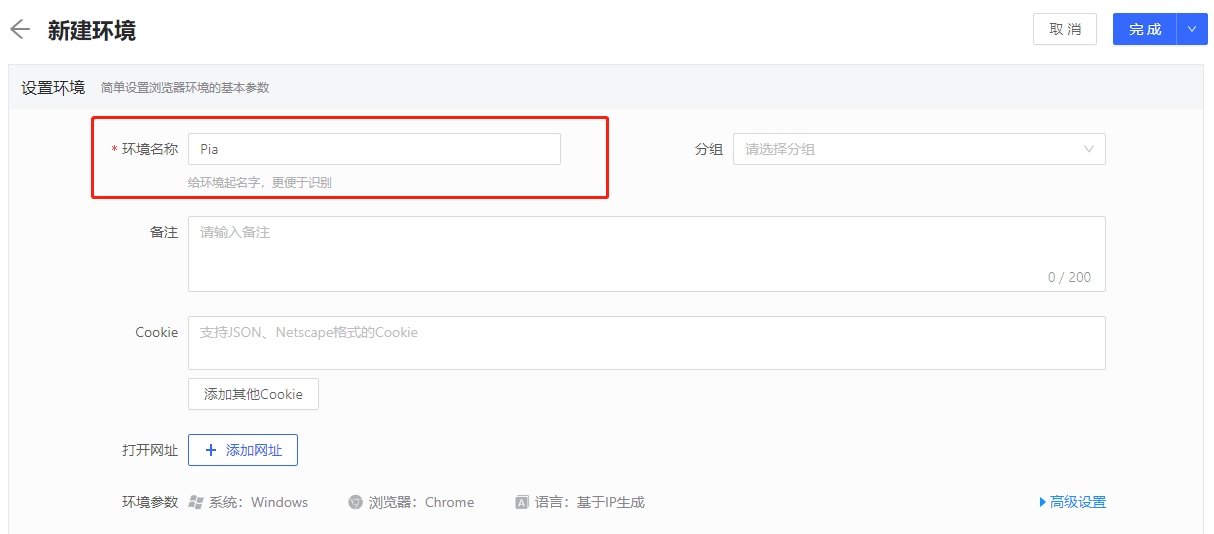
4. give the environment a name
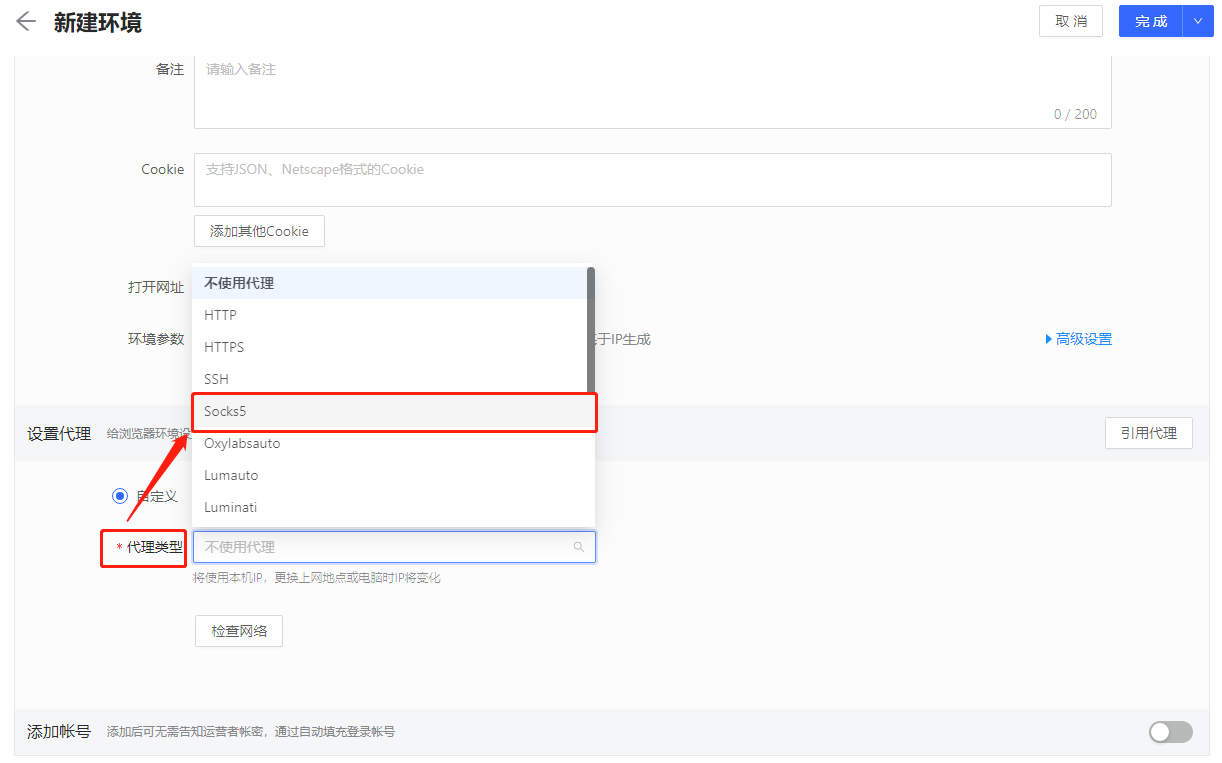
5. Proxy type selection Socks5
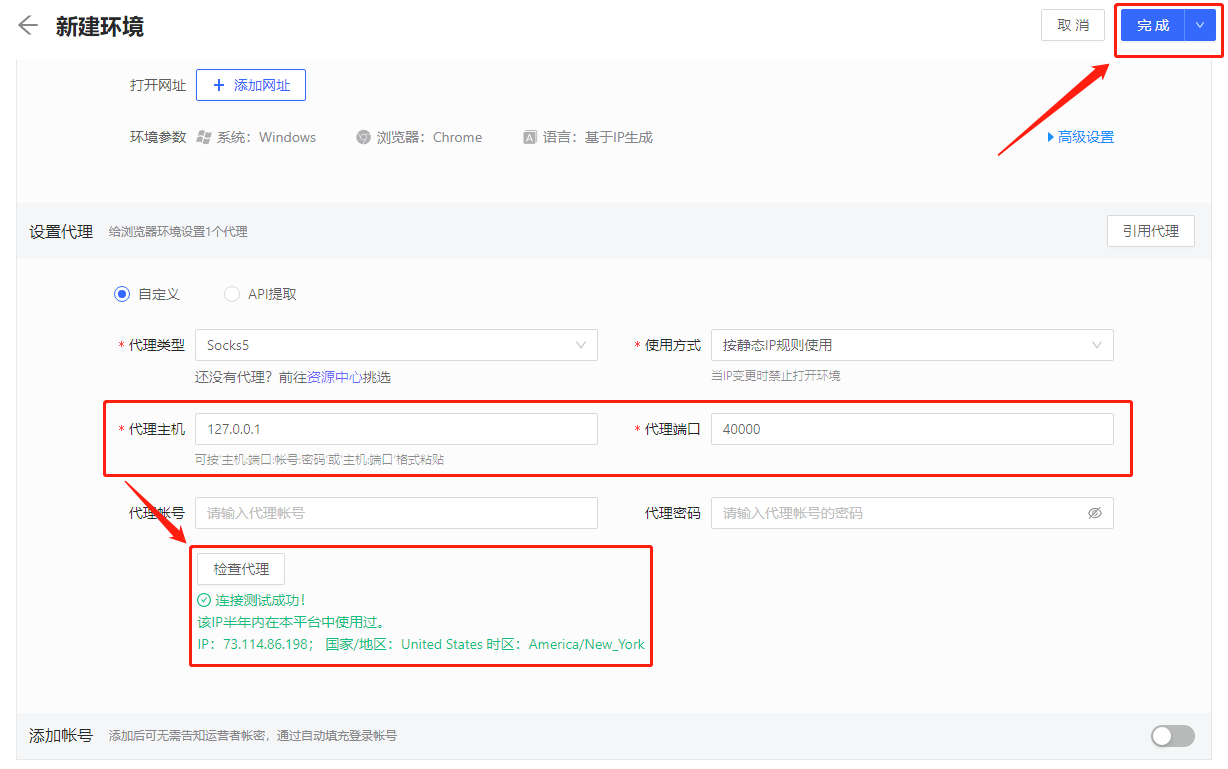
6. Paste the proxy IP and port you copied just now, and click "Check Proxy". After the check is complete, click "Finish"
7. After the final save is complete, click Open to start
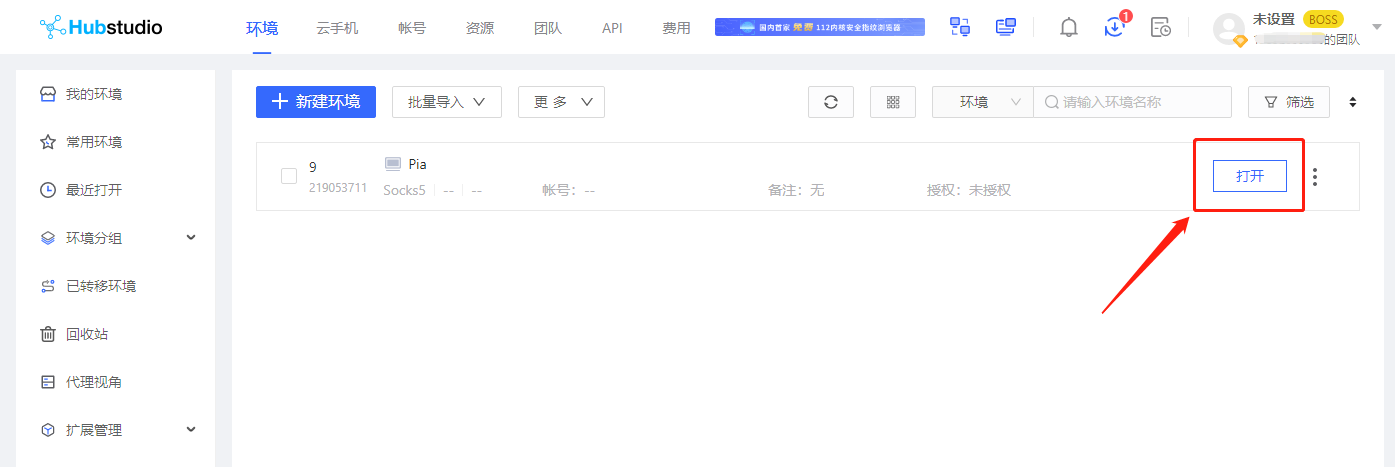
Through the above steps, you have successfully configured the proxy on the Hubstudio anti-detection browser, providing more secure and flexible options for network connections.
This document provides you with everything you need to get started with our proxy
If you can't find something or need assistance, please contact us at support@piaproxy.com or via our 24/7 live chat.
Our file has two main parts. The first one is dedicated to PIA proxy integration proxy and the second one is dedicated to the use of the free tool
This section contains information about using free tools, where you can find the specific process and method for configuring each tool and proxy IP. Choose the proxy tool that's right for you and follow the guidelines for smooth integration.
If you need any assistance, please feel free to contact us at support@piaproxy.com We will try our best to help you solve the problem.