Integration of Pia S5 Proxy and Dolphin{anty}

Hello! Here we will tell you how to integrate and easily manage PiaProxy proxies in anti-detect browser Dolphin{anty}. Let's do it step by step.
Step 1 - Proxy preparation
Before starting the integration, we need to choose a plan in piaproxy.com and prepare a proxy.
1. Register an account (if you haven't already)
2. Download a client to find and manage proxies.
3. Install the client.
4. Launch the client and follow the instructions.
Step 2 - Download and Install
1. Go to the browser website → anty.dolphin.ru.com.
2. Hover over the download button and click on your operating system.
3. Register an account by clicking the Sign up button. Enter the promo code → PIAPROXY and get a 20% discount on your first subscription payment.
4. Open the setup file and follow the steps. The installation process is no different from any other software.
Step 3 - Creating a browser profile with a proxy
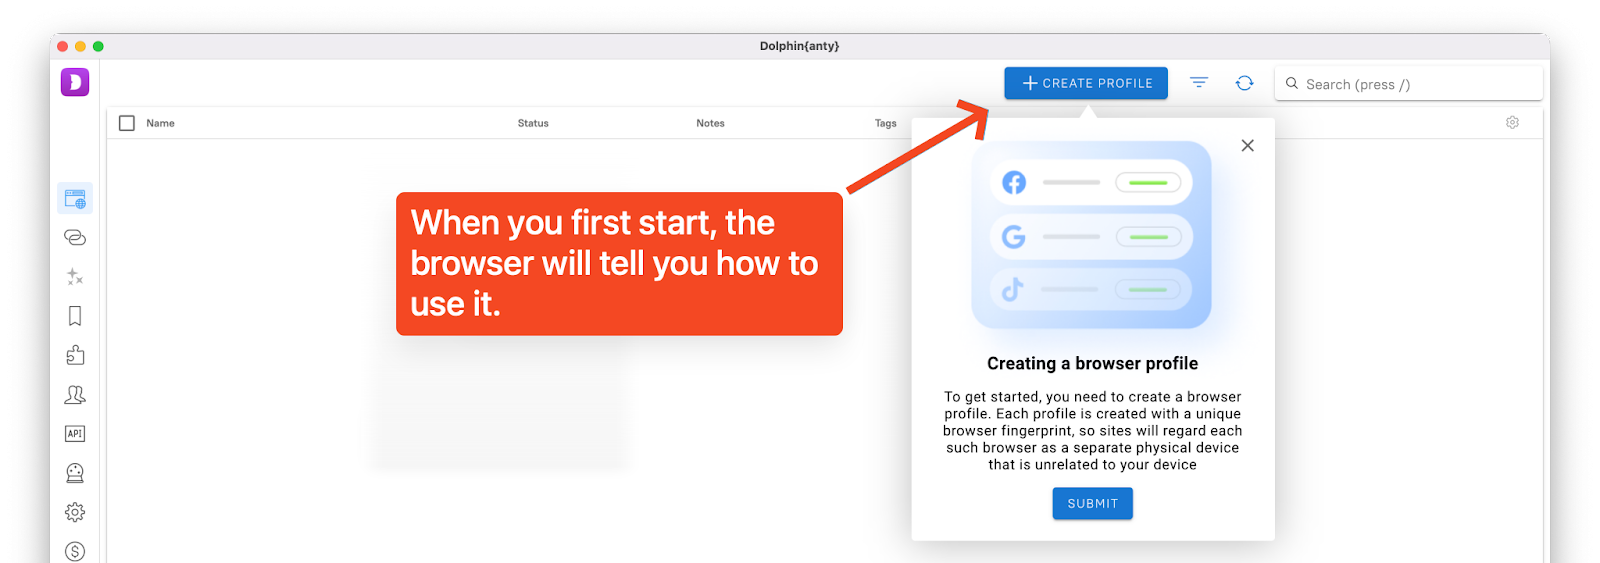
1. Open the Dolphin{anty} browser client.
2. Click the Create Profile button.
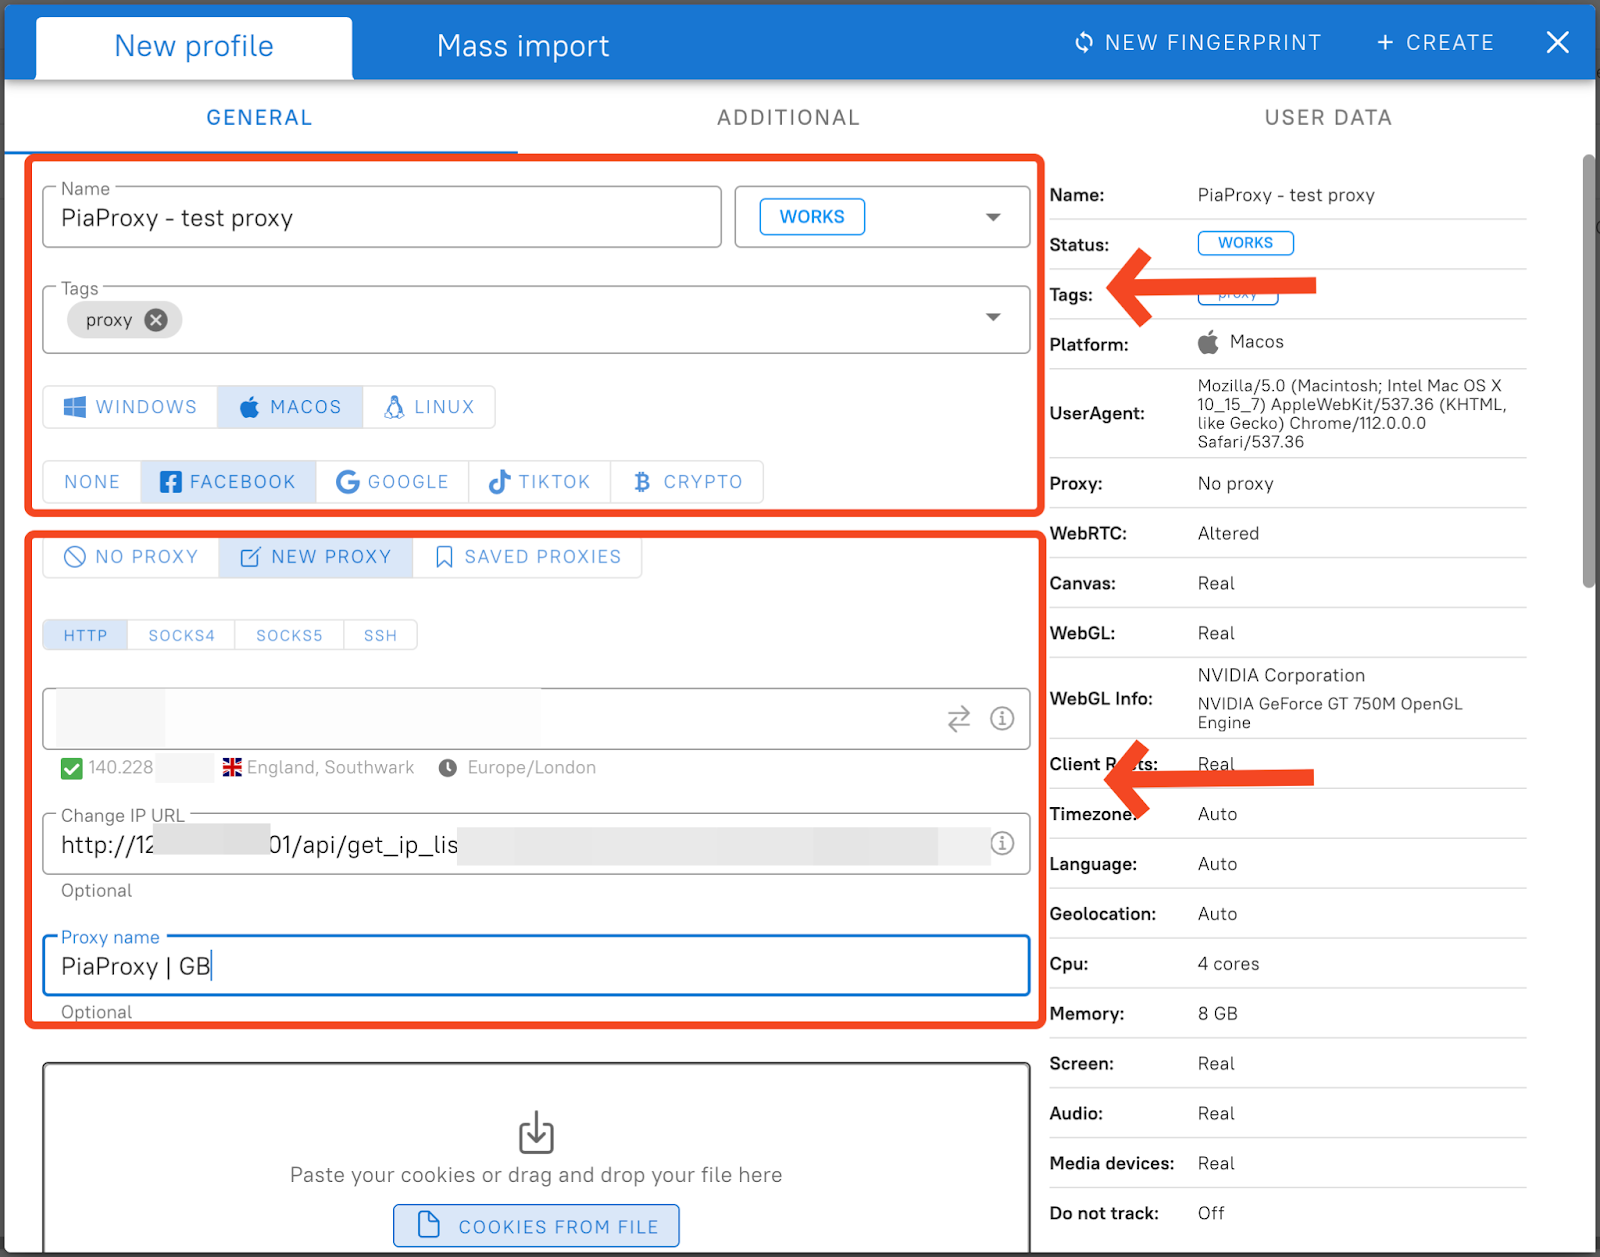
3. In the window that appears, configure the desired browser profile settings: name, OS, purpose of use, and status and tag as desired.
4. Go to your piaproxy personal account and copy the required proxies.
5. In the Dolphin{anty} profile creation window, select New proxy → connection type (http, socks) → insert proxy data in the hostname:port:username:password format.
6. If you are using a rotary proxy, you can paste the URL link to manually change the IP on click.
7. Give the proxy a name so you can quickly find it in the future.
8. Proxies are set up. Click the create button in the upper right corner to complete the profile creation.
9. The profile is ready to go.


Step 4 — Managing and Bulk Importing Proxies
We figured out how to set up one proxy in a new profile. Now consider the case where you need to manage a large number of proxies. Dolphin{anty} has a separate function for managing existing proxies, here you can view a list of all previously added proxies, check their performance, edit or delete them altogether.
Click on the Proxy button in the left column to go to the proxy manager.
Here you can notice a list of all your proxies. They can be managed in bulk by ticking the appropriate checkboxes.

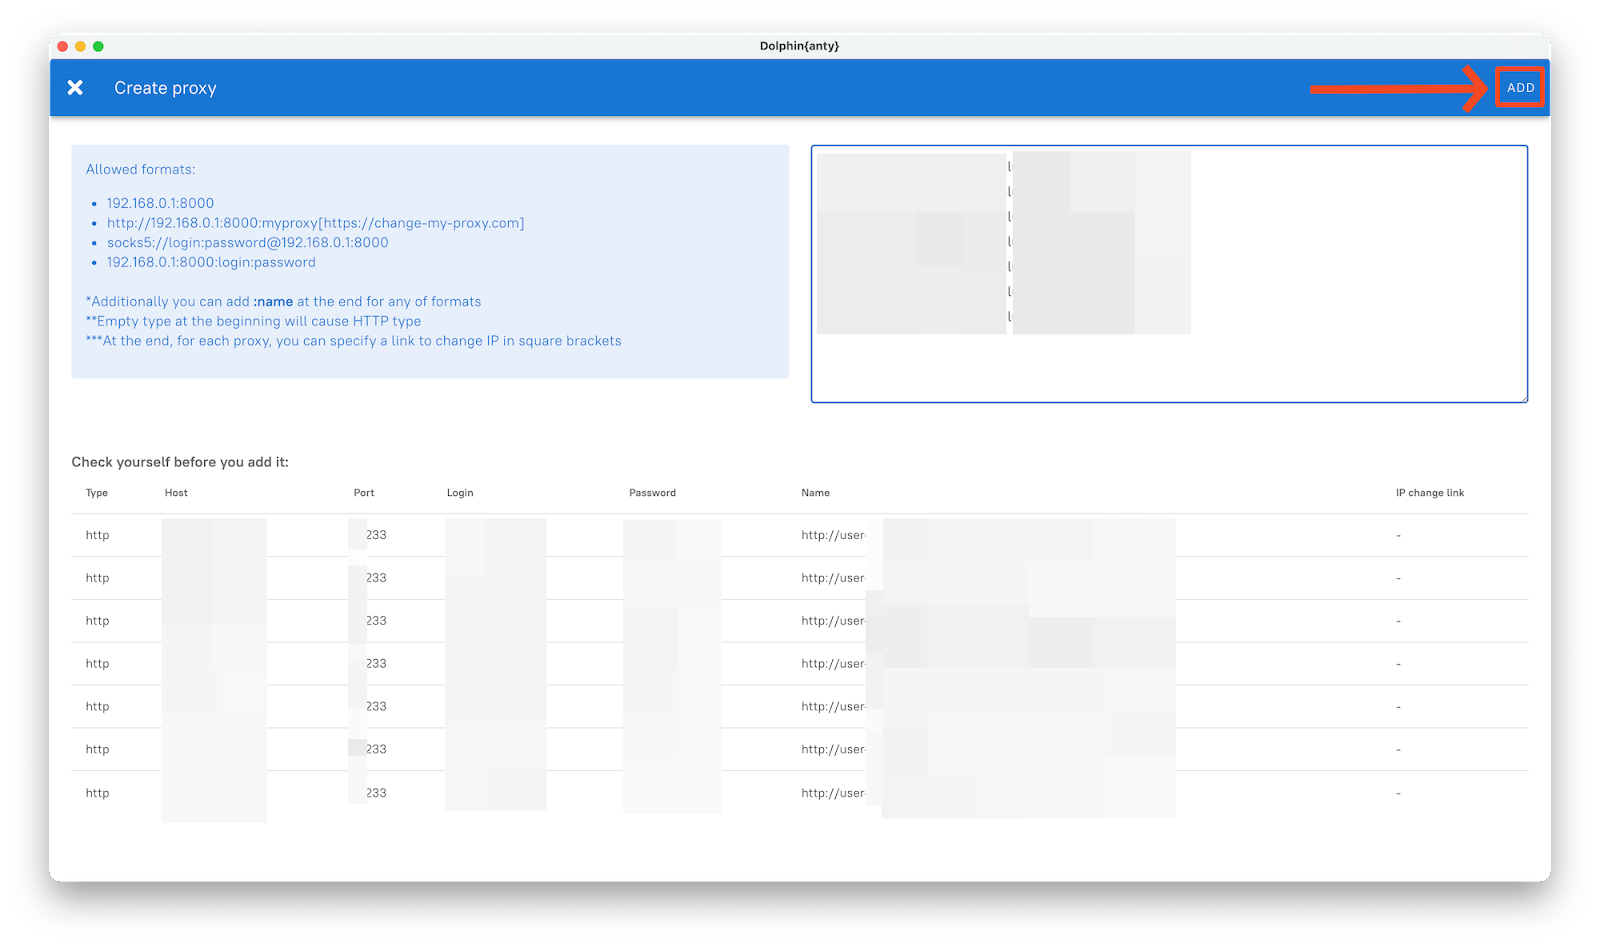
1. Click the Create Proxy button to add a proxy in bulk.
2. You will see a window for importing a proxy. On the left you can see in what format to insert proxy data. Once pasted, click the add button in the top right corner.

Your proxies are added and ready to go. Have a nice work!
✅Sign up for Dolphin{anty} with the PIAPROXY promo code right now and get 10 browser profiles for free forever!


