Residential proxy limited time offer Residential proxy limited time offer:80GB for free, 10% Off!

Grab it now

Grab it now
top-banner-close
logo_img logo_img_active

close

Trusted by more than 70,000 worldwide.

100% residential proxy 100% residential proxy
Country/City targeting Country/City targeting
No charge for invalid IP No charge for invalid IP
IP lives for 24 hours IP lives for 24 hours
Adspower Bit Browser Dolphin Undetectable LunaProxy Incognifon
Award-winning web intelligence solutions
Award winning

Create your free account

Forgot password?

Enter your email to receive recovery information

Email address *

text clear

Password *

text clear
show password

Invitation code

I have read and agree

Terms of services

and

Already have an account?

Email address *

text clear

Password has been recovered?

< Back to blog

Integration of Pia S5 Proxy and Ximera

Jennie . 2023-06-12

1686536534633646.png

step 1

Download and install Ximera

Website:https://ximera.pro/?p=PIA


step 2

Add proxy settings

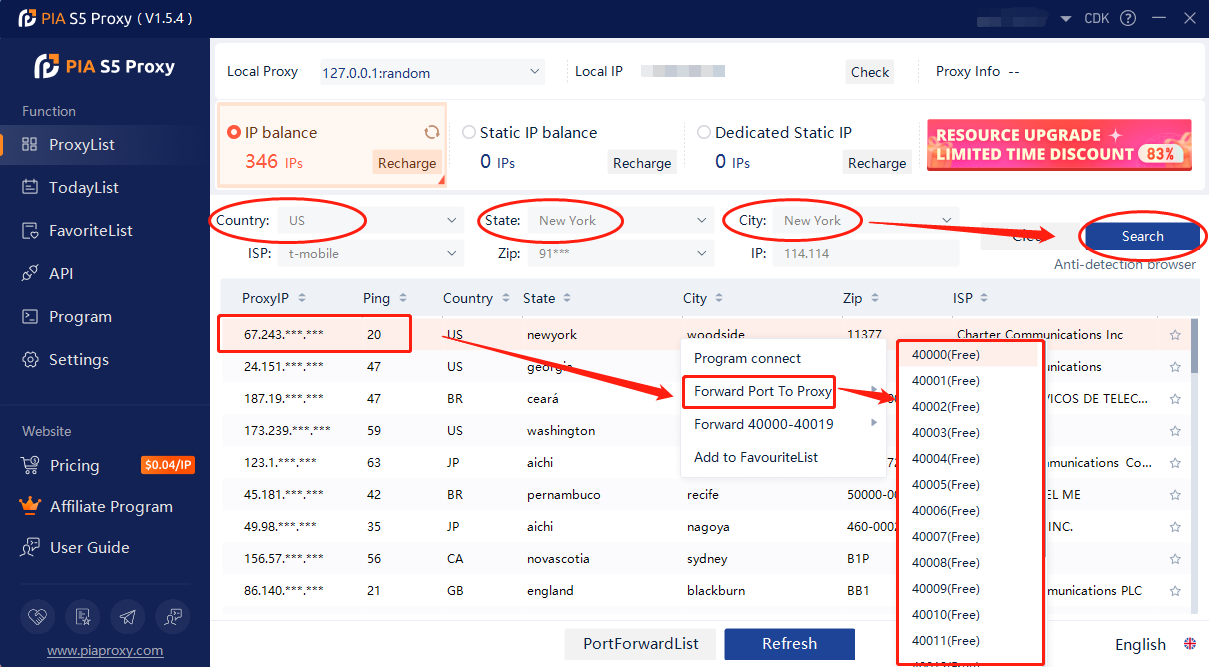
1. After selecting the country, continent, and city, click the "Refresh" button, and then right-click to select the proxy IP and port
1686536577692657.png

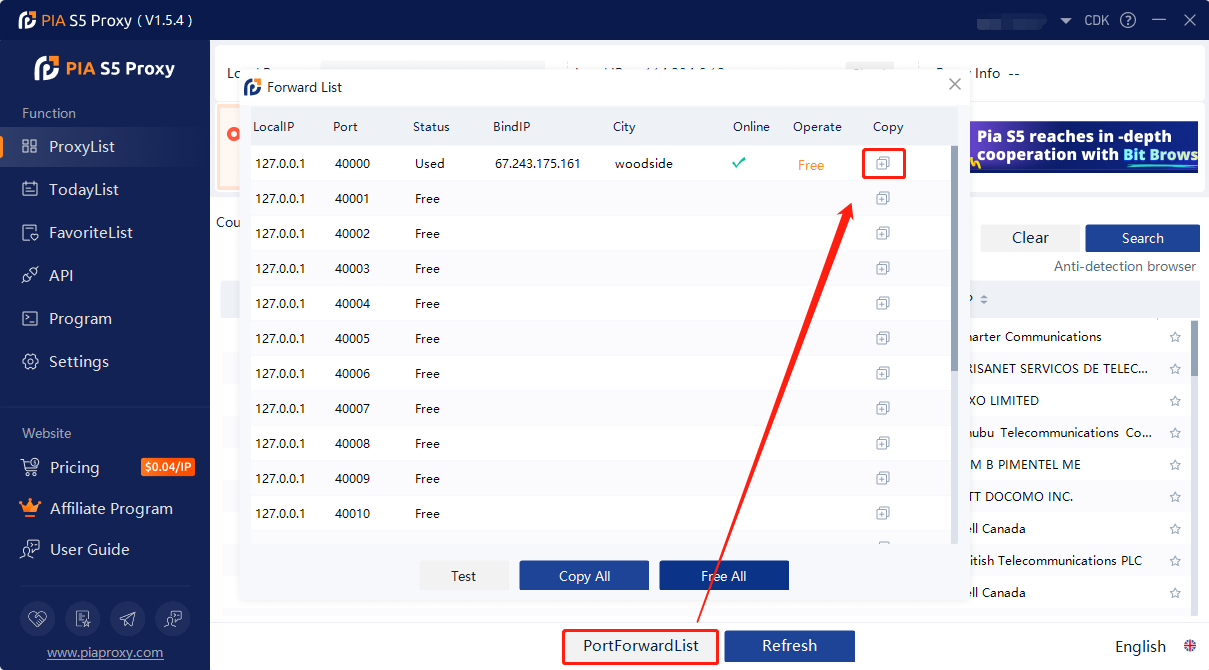
2. Then click the port forwarding list below and copy the port number you just selected
1686536603170008.png

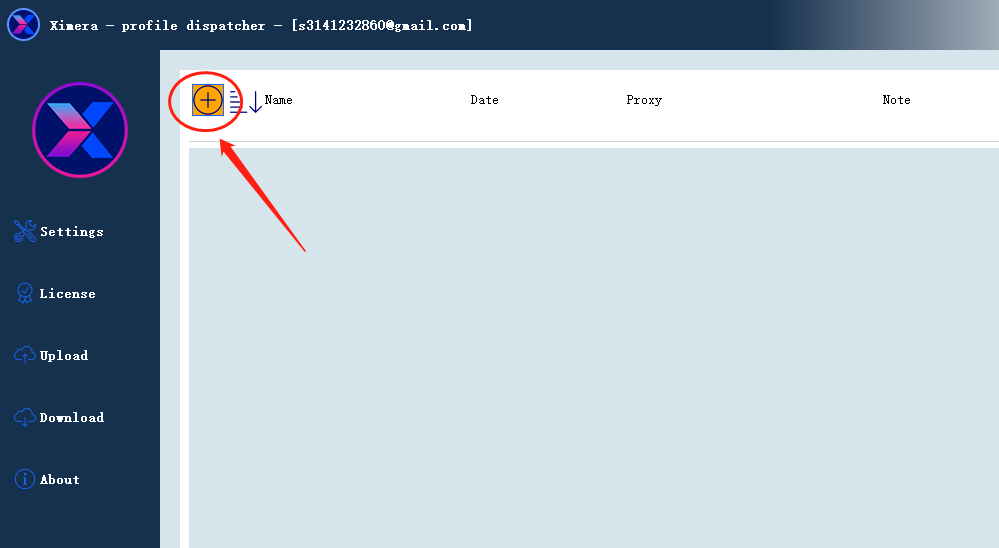
3. After logging in to Ximera, click the "+" button in the upper left corner
1686536647499461.png

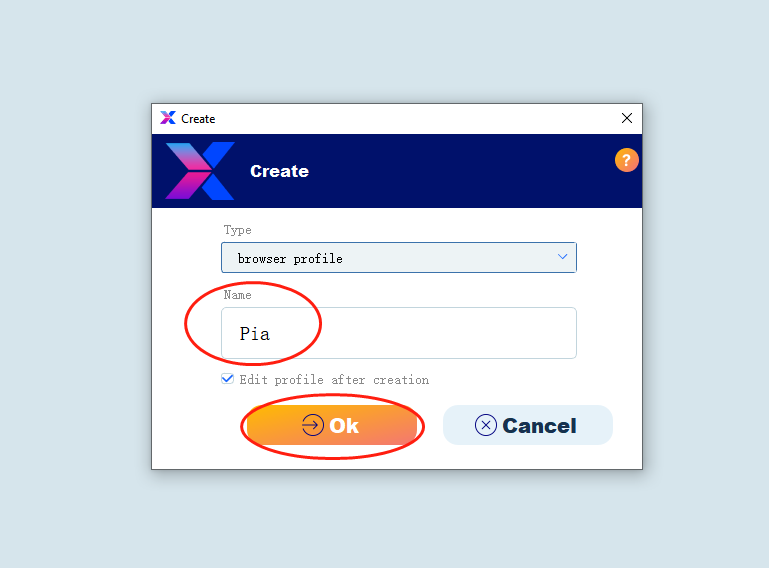
4. Enter the name and click ok

Pias5proxy和ximera使用教程4.png

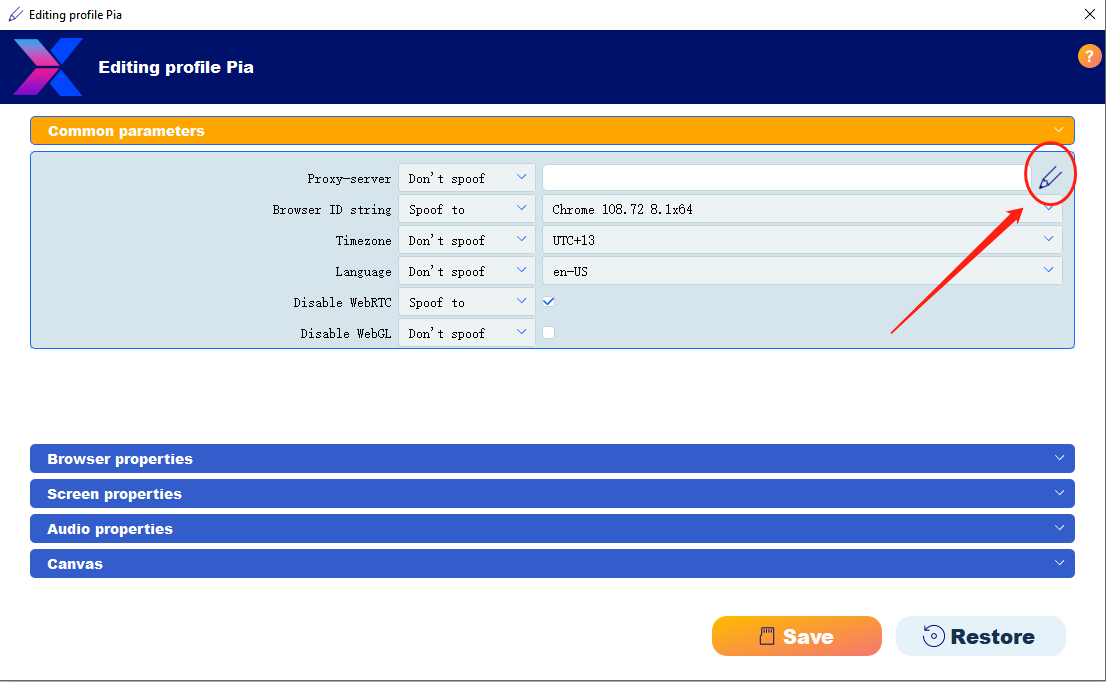
5. Click on the pencil button

1686536718231313.png

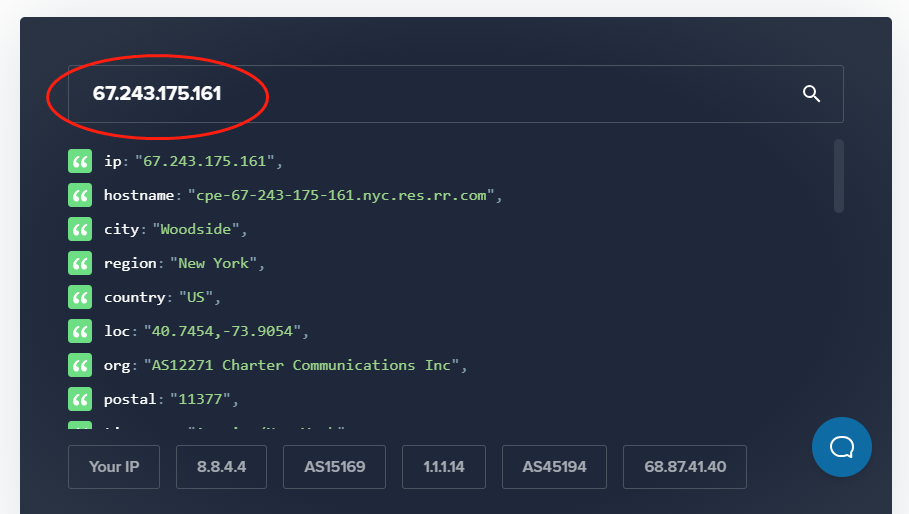
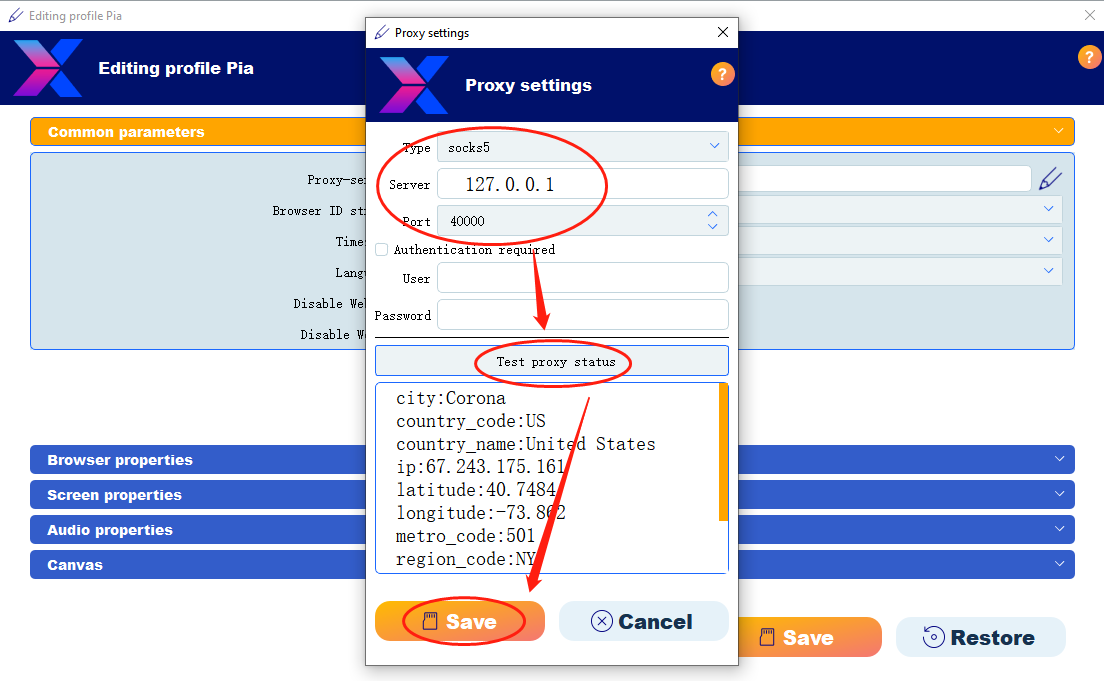
6. Paste the proxy IP and port you copied just now, then click Test Proxy, and click Save after the test is successful
1686536757126796.png

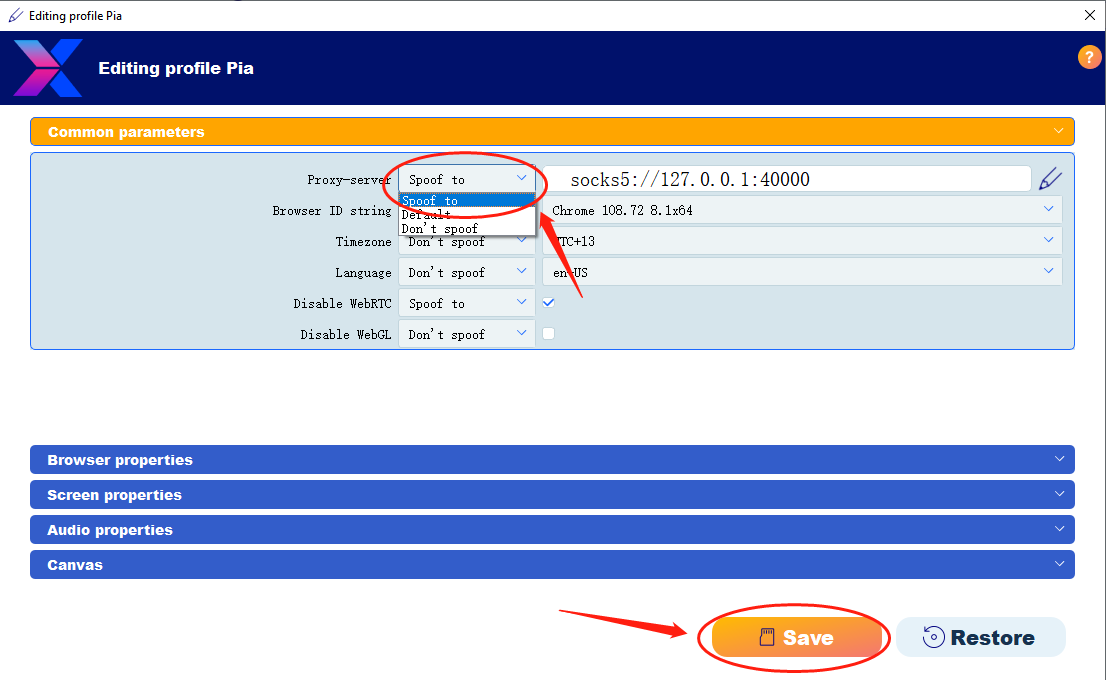
7. Select spoof to as the proxy server
1686536804322639.png

8. After saving successfully, click to start the browser

1686536848799810.png

9. Proxy settings are now successful

1686536881386851.png

In this article: